If you’re experiencing issues like a check engine light, poor fuel economy, or failed emissions tests, it might be time to investigate your oxygen sensor, also known as the O2 sensor. A functioning O2 sensor ensures your engine runs efficiently and your car meets environmental standards by maintaining the optimal air-fuel mixture. But how do you test an O2 sensor? Whether you’re a car enthusiast, DIY mechanic, or just a curious car owner, this guide will walk you through how to test an O2 sensor step by step using tools like a multimeter or a scanner. By the end, you’ll know how to confidently diagnose oxygen sensor problems and maintain your car’s performance.
What is an O2 Sensor and Why Is It Important?
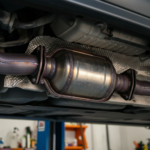
An oxygen sensor is a crucial component of your car’s exhaust system that helps monitor and adjust the air-fuel ratio in the engine. It’s located either in the exhaust manifold or downstream of the catalytic converter. By measuring the amount of oxygen in the exhaust gas, the sensor sends real-time data to the car’s engine control unit (ECU). This ensures efficient combustion and minimizes emissions.
However, if an O2 sensor fails, it can lead to imbalanced air-fuel mixtures, engine performance issues, and even damage to your catalytic converter. Regular sensor testing is critical to preventing costly repairs.
Common Signs of a Bad O2 Sensor
Before testing, it’s essential to recognize the typical symptoms of a malfunctioning sensor:
- Check Engine Light Illuminates
Faulty O2 sensor readings can trigger error codes. Use an OBD-II scanner to retrieve the specific code.
- Poor Fuel Economy
A bad oxygen sensor can cause the ECU to run a “rich” mixture, consuming excessive fuel.
- Failed Emissions Tests
Malfunctioning sensors disrupt emissions control, resulting in higher pollutant output and failed inspections.
- Rough Engine Idle or Misfires
If the air-fuel mixture is off, your engine might run unevenly or misfire.
For a detailed list, visit Symptom Detector’s guide on bad O2 sensor symptoms.
Now that you’re familiar with the signs, let’s get into how to test an O2 sensor step by step.
Step-by-Step Guide to Test an O2 Sensor
1. Gather the Tools You’ll Need
Testing your O2 sensor doesn’t require expensive equipment. Here’s what you’ll need:
- A multimeter (digital is preferable for accuracy).
- An OBD-II scanner (optional but useful for detailed diagnostics).
- Safety gear like gloves and goggles.
- A repair manual specific to your car model.
2. Locate the O2 Sensor
Your vehicle will typically have one or more oxygen sensors located:
- Upstream (before the catalytic converter).
- Downstream (after the catalytic converter).
Refer to your car’s manual for the exact locations.
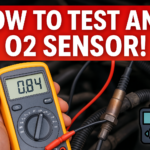
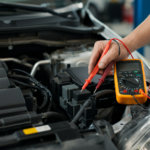
3. Test the O2 Sensor with a Multimeter
Using a multimeter is one of the most reliable methods for testing O2 sensor functionality. Here’s how to test an O2 sensor with a multimeter:
a. Check for Voltage
- Set your multimeter to “DC voltage.”
- Connect the probe to the signal wire of the O2 sensor.
- Start the engine and wait until it reaches the operating temperature.
- Observe the voltage readings. A healthy sensor’s output should fluctuate between 0.1V (lean) and 0.9V (rich).
b. Perform a Continuity Test
- Disconnect the connector and set your multimeter to the continuity mode.
- Place the probes on the heater circuit terminals.
- If you get no continuity, the heater circuit is broken, and the sensor needs replacement.
c. Check the Internal Resistance
- Switch your multimeter to “ohms” mode.
- Place the probes on the heater element terminals.
- A healthy O2 sensor typically has a resistance value between 6 to 12 ohms. Refer to your car’s manual for precise specs.
For more guidance, check out this helpful Multimeter Testing Guide.
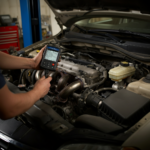
4. Test the O2 Sensor with a Scanner
If you prefer a more automated method, here’s how to test the O2 sensor with a scanner:
- Plug the OBD-II scanner into your car’s diagnostic port.
- View the live data stream for the O2 sensor voltage, and check if it fluctuates between lean and rich values.
- Modern scanners can also identify specific fault codes like P0130 or P0420, indicating oxygen sensor problems.
5. Inspect Physical Condition
Remove the sensor and check for:
- Black soot or excessive carbon buildup.
- Corrosion or visible damage to the signal wires.
- A loose connection to the exhaust manifold.
6. Test Real-Time Sensor Performance (Live Data)
Some advanced scanners allow you to monitor sensor performance in real-time. Using live data, you can check how the sensor adjusts the air-fuel mixture during driving conditions.
How to Check if Your O2 Sensor is Bad
- Use a multimeter to test voltage and resistance.
- Monitor live data using a scanner for erratic readings.
- Conduct a visual inspection for physical signs of wear.
- Evaluate fuel efficiency, idle quality, and emissions performance.
If repeated tests indicate failure, it’s time to replace your sensor to prevent long-term damage to the catalytic converter or exhaust system.
When Should You Replace Your O2 Sensor?
Oxygen sensors typically last between 60,000 to 90,000 miles. Replace them sooner if you notice symptoms like failed emissions tests, poor fuel efficiency, or a check engine light.
Final Notes on Diagnosing Oxygen Sensor Issues
Diagnosing and testing oxygen sensors is an essential aspect of maintaining your car’s health. Whether you opt for a multimeter or scanner, these steps will help you identify faulty sensors and maintain engine performance. For added insights about air-fuel mixtures, visit Mechanical Basics.
By regularly monitoring your O2 sensors, you can avoid failed emissions tests, improve fuel efficiency, and prolong the life of your vehicle.